Introduction
The Balancer ecosystem uses a modified version of Curve's Vyper gauge infrastructure. This page outlines how to stream secondary reward tokens (non-BAL) to LPs through Balancer's gauge system.
BAL emissions halted
Per BIP-919 (BAL Tokenomics Revamp), BAL emissions to gauges are halted and all voting-incentive markets (StakeDAO Votemarket, Paladin, etc.) have been terminated. Sections below cover secondary (third-party) reward distribution only. The veBAL gauge-controller voting flow and the BAL gauge governance process described in prior documentation are no longer operative for new gauges.
Secondary Reward Token Incentives
The MAXYZ service provider has built a sophisticated infrastructure to create and manage secondary reward campaigns for Balancer staking gauges. To make full use of this system, tooling is provided to facilitate the setup.
Info
To facilitate the management and configuration of secondary reward programs, the DAO Operations UI serves as an entry-point to configure, view and modify secondary reward programs and other related DAO payloads.
For secondary reward distributions on Balancer, following limitations apply (given Balancer's staking gauges are based on Curve's Vyper implementation):
- A staking gauge can have up to 6 reward tokens. Keeping the number low (≤ 3) is recommended to limit gas costs for LPs claiming rewards.
- A gauge distributes rewards in a 1 week schedule after receiving funds. Meaning if you deposit 100 Token A on Monday 00:00 UTC, then those 100 tokens will be distributed over 7 days at a rate of 14.285 tokens / day assuming there is BPT staked in the gauge.
- Each reward token has its own 1 week distribution schedule based on the time of deposit
Note
Directly depositing reward tokens to the gauge contract will result in loss of funds! If you want to manage deposits yourself, make sure the depositor is whitelisted as a distributor and that you call deposit_reward_token
Guide: Create a Secondary Reward Token Program on Balancer
These sections will provide a step-by-step guide on how to enable, program and distribute secondary rewards based on the rewards injector infrastructure.
Info
The MAXYZ service provider is the primary POC for incentive management and is happy to assist you along the way of setting up your incentive plans. You can also manage injectors yourself if you please to do so.
Step 1: Token Whitelisting
Prerequisite for the reward token to be properly picked up by the infrastructure is that it is whitelisted in the tokenlist. Whitelist the reward token by doing a pull-request here. Make sure you are providing a checksummed entry for the relevant network.
Step 2: Gauge Creation
Before setting up secondary rewards, you need a gauge for your pool. Follow the Gauge Onboarding Guide to create your gauge. This guide covers:
- Creating gauges for Ethereum Mainnet pools
- Creating child-chain gauges for L2 networks
Once your gauge is created, you can proceed with configuring secondary rewards. No governance approval is required for secondary reward routing.
Step 3: Rewards Injector Creation
Info
The MAXYZ service provider is available to help setup and deploy rewards injectors. For more information on the Injector v2 infrastructure, consult the repository documentation.
Depending on your use-case you want to create a rewards injector for your reward token. In that case, you need to follow a series of configuration steps outlined below. A rewards injector has the purpose of streamlining the distribution of rewards to gauges on Balancer. It takes care of correct token deposits and timely execution based on Chainlink automation. Furthermore, the rewards injector infrastructure is fully customizable and manageable through the operations UI overall streamlining the process. Follow these steps if you want to utilize this infrastructure:
- Create a new rewards injector from the factory using the Injector Creator interface. Depending on your needs, choose different initial configuration parameters
Tips
The canonical factory for injectors v2 can be accessed via 0x6142582f8946bf192a4f80ed643a5856d18a7060 on all networks Balancer is currently deployed to.
- If your new injector has been set up correctly, it will show up in the Injector v2 viewer drop-down list
- For the injector to properly work, set up Chainlink automation as outlined in the injector documentation. If this is not configured, the injector will not automatically trigger reward distributions to gauges.
Step 4: Gauge Configuration
Whitelisting Reward Tokens on a Target Gauge
Tips
Deploying secondary incentives on Balancer is not fully permissionless. For a token to be added as reward token, an authorized multi-sig needs to whitelist that token. The MAXYZ service provider controls this infrastructure and will facilitate whitelisting.
A gauge can only receive secondary token rewards from a registered distributor. On the gauge contract you can read the current configuration via the reward_data field by passing the reward token address as input argument. If your reward token is not registered, follow these steps:
- Go to the Add Reward Token to Gauge payload builder on the operations UI
- For the input arguments, do the following:
- Target gauge: the gauge you want to whitelist
- Reward token: your desired reward token
- Distributor address: your injector or alternative reward distributor
- Click "Add Reward"
- Generate payload and review / simulate via tenderly
- Do a pull request via the operations UI. The payload will be reviewed and loaded within 12h of receiving the request
- Once the payload has been executed by the managed multi-sig, you should see the reward token configuration by using the
reward_datamethod
Step 5: Rewards Injector Configuration
Info
Be careful when setting up rewards schedules. If Chainlink automation and a program without a start timestamp are setup, this will mean that incentives will directly be distributed if they are present in the injector
Comprehensive infrastructure and tooling has been built to make this process as easy as possible. Before configuring an injector make sure the following criteria are met:
- Gauge created (see Gauge Onboarding Guide)
- Reward token and injector as distributor correctly set up
- Reward token is whitelisted on the Balancer tokenlist
- Chainlink Automation: Injector Upkeep is correctly configured and there is enough LINK to fund the upkeep (more details on this topic here)
Now you can create your own schedule with the injector configuration tool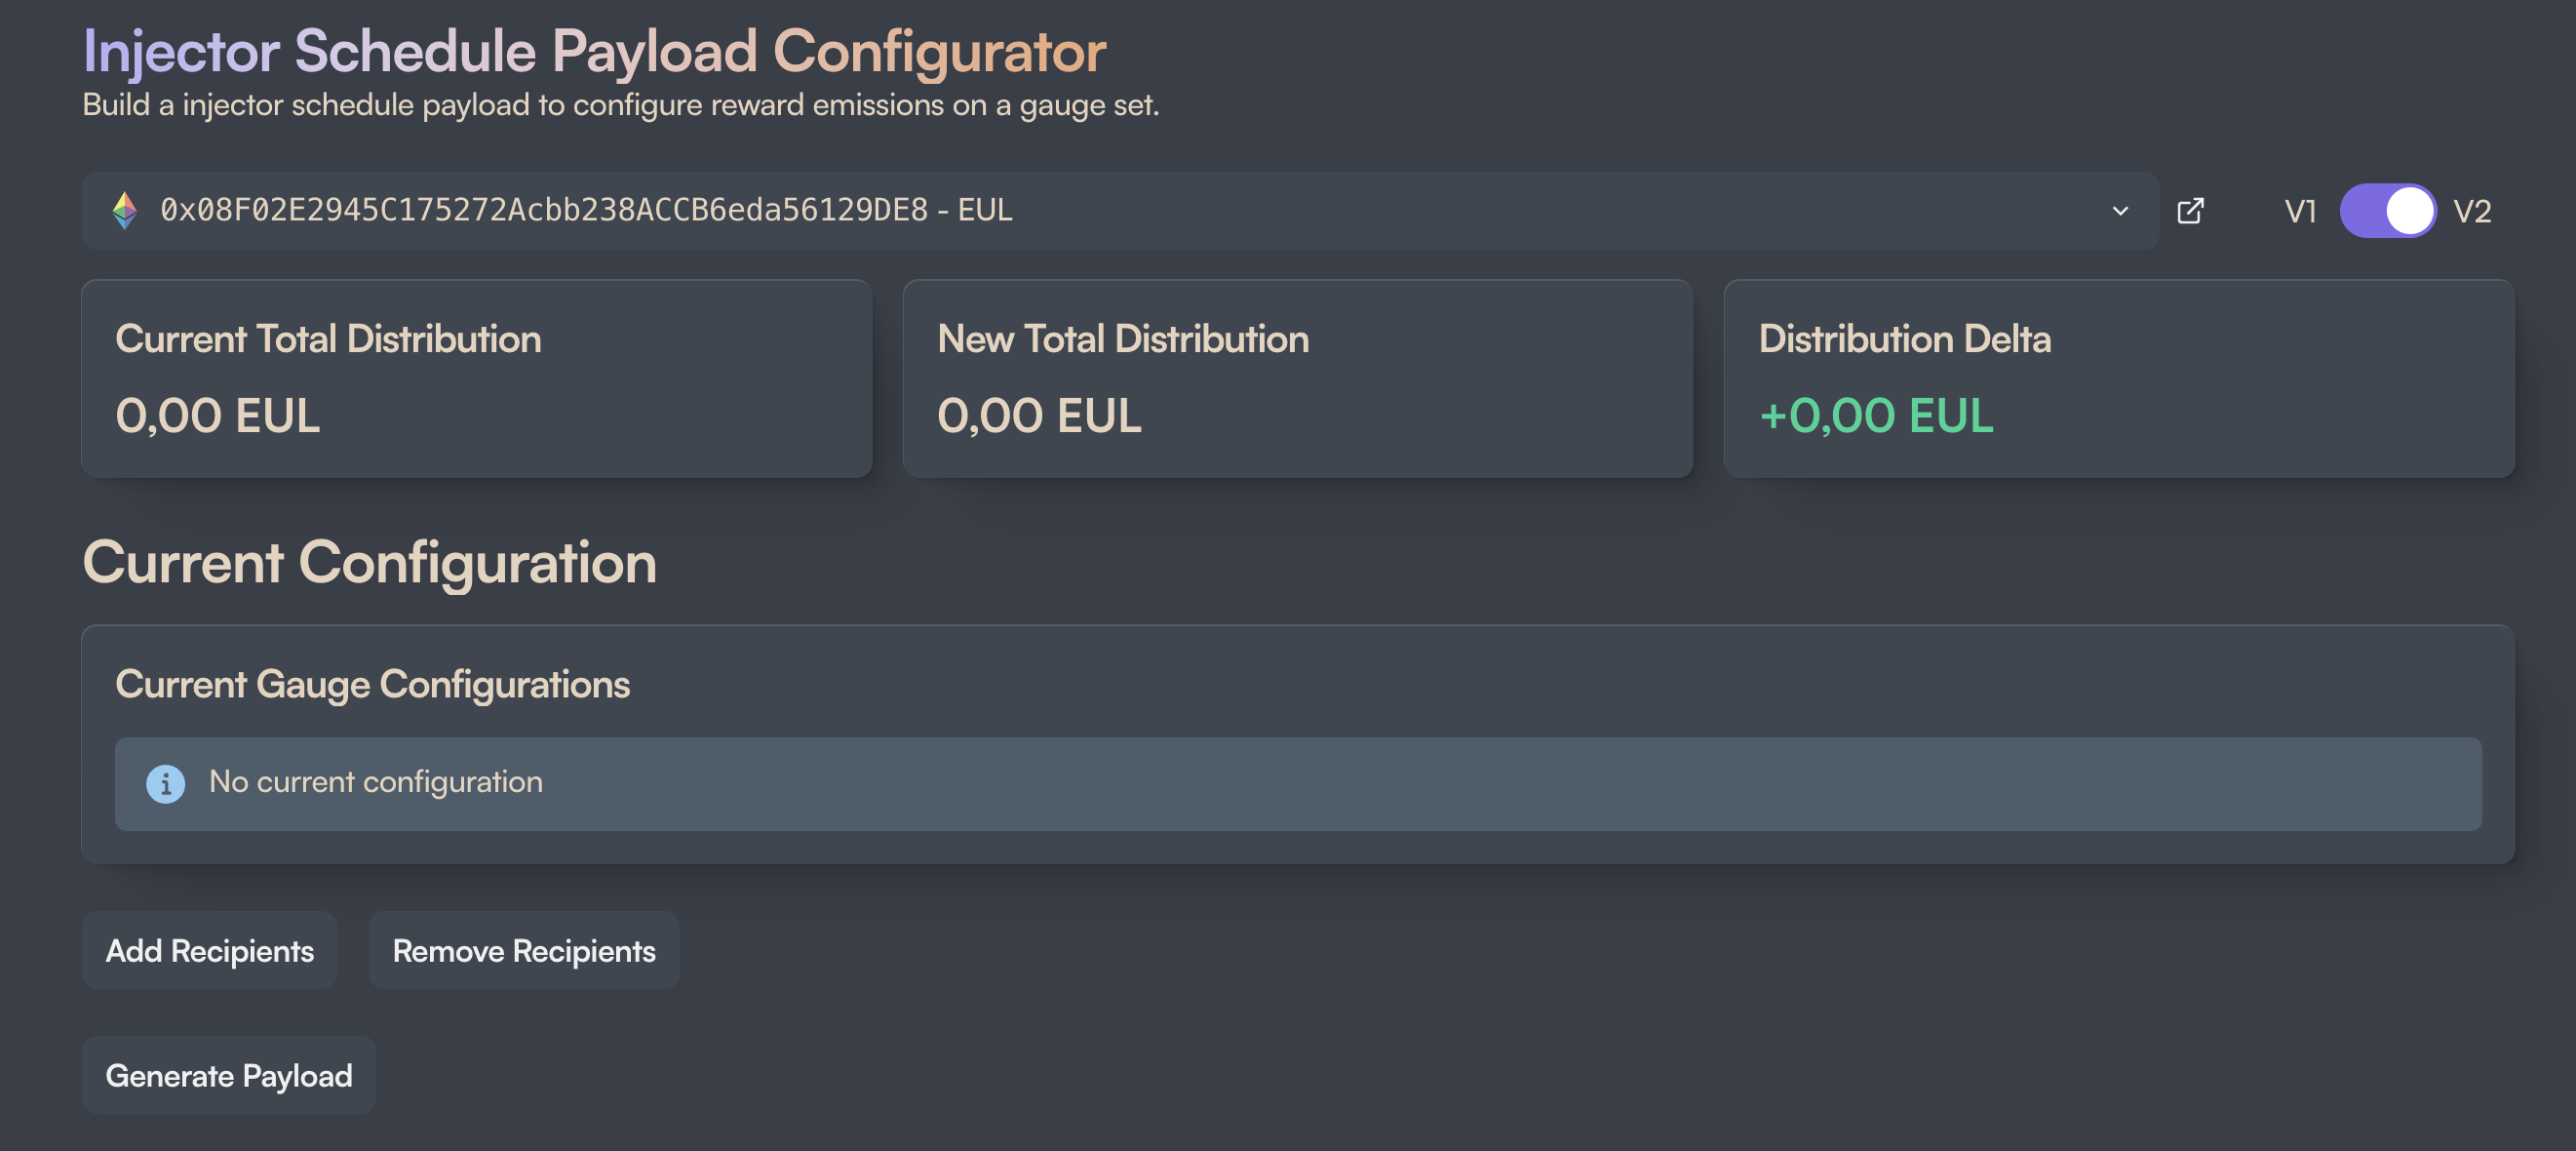
- Click on "Add Recipients"
- Choose the parameter set for your incentive program:
- Recipients: Enter your target gauge(s) you set up in the previous steps
- Define the amount per one week period you want to emit
- Define for how many periods (weeks) the program will run
- If you want to define a specific start date, fill out a UNIX time stamp
- Generate the payload
- Review if the Tenderly simulation passes correctly
- If the MAXYZ service provider is set as manager, do a pull request via the operations UI. If you have set your own multi-sig or other EOA as manager, execute the payload via your safe.
Step 6: Funding of the Rewards Injector
Funding is straightforward: you can simply deposit funds into the injector contract. Rest assured that the configured owner can sweep any amounts left in the injector at any time.
Note
If you have set up a new injector, or if you have modified an incentive program, we advise to only fund it, when you are certain that the configuration will result in the desired outcome. Once an injector has an active program without any start date in the future, it will immediately release funds / start the program after receiving them.
Secondary Reward Setup Checklist
Given the many steps involved in setting up a secondary rewards program, we made this checklist for you to go through based on the above step-by-step guide: